Custom
The custom anti-sniper feature allows you to use a custom anti-sniper solution with the overlay. After you set it up a request will be sent to the provided API every time a player is added to the overlay or refreshed, and the overlay will display the response received in a user-friendly way.
This feature is aimed towards advanced users. If you're unsure how this can be used then you most likely will not find this useful.
Setup
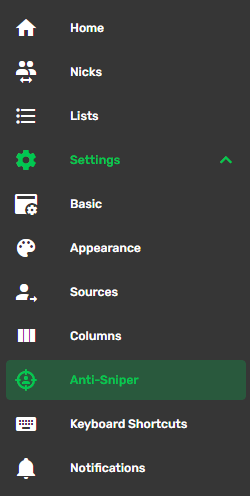
Open anti-sniper settings using the menu.

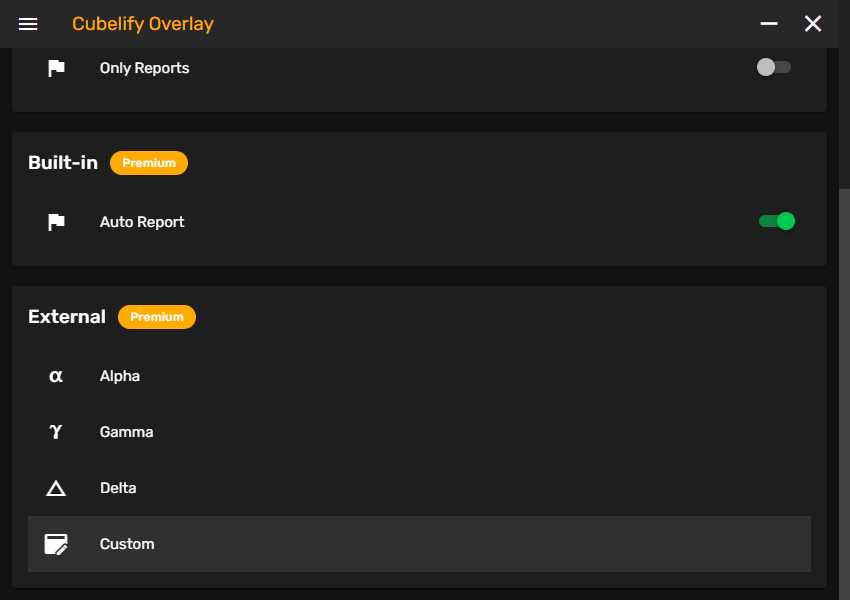
Locate and open custom external anti-sniper settings.

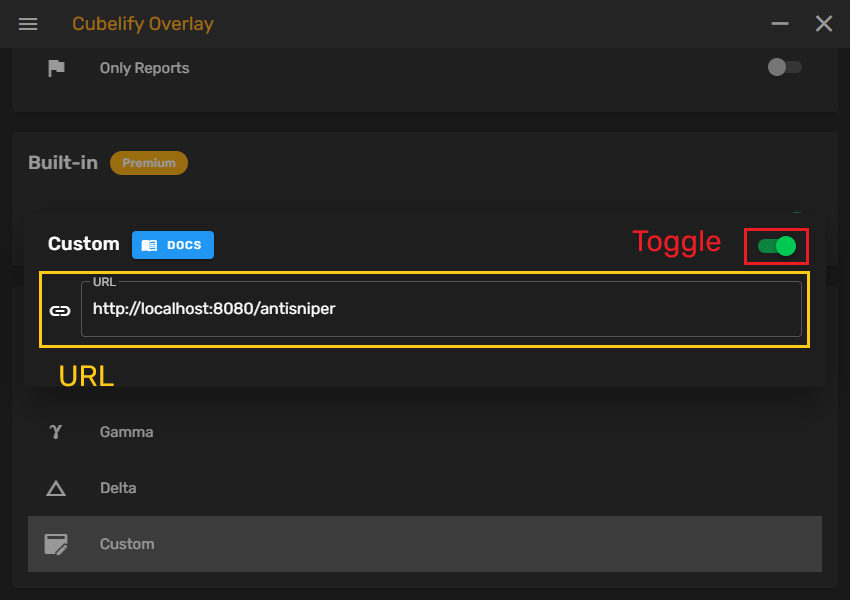
The settings modal will then open.

The toggle button allows you to enable or disable the custom anti-sniper.
The URL field allows you to set the URL to which a request will be sent.
More details regarding how this works are provided below.
Development
Request
Every time a player is added to the overlay or refreshed, a GET request will be sent to the URL provided in
settings (if the custom anti-sniper is enabled).
Default query fields
If you don't include any placeholders in the URL, the following query fields will be set for the URL you've provided:
id- the UUID (dashed) of the playername- the username of the player
Data already present in the URL's query string will be kept, unless the field names conflict with the ones mentioned above, in which case their values will be replaced.
Placeholders
You can also provide any of the following placeholders in the URL. These placeholders will be replaced with appropriate values when making a request. Please note that if any of these placeholders are included, the default query fields mentioned above will not be added.
{{id}}- the player's dashed UUID{{name}}- the player's username{{sources}}- the player's comma separated sources list
| Placeholder | Description | Possible values | Example |
|---|---|---|---|
{{id}} | Player's dashed UUID | f7c77d99-9f15-4a66-a87d-c4a51ef30d19 | |
{{name}} | Player's username | hypixel | |
{{sources}} | Player's comma-separated sources list | GAME, PARTY, PARTY_INVITES, CHAT, CHAT_MENTIONS, MANUAL, ME | GAME,PARTY,ME |
Headers
Modifying headers for the request is not possible. If you'd like to authenticate the requests, you could use a query field for that purpose, for example:
https://antisniper.com/antisniper?key=secret
Response
The response that your API provides should have the following format:
interface Response {
  score?: {
    value: number
    mode?: "add" | "set"
  }

  tags?: {
    icon?: string
    text?: string
    tooltip?: string
    color?: number
    textColor?: number
  }[]
}
The response must match the JSON Schema at https://storage.cubelify.com/overlay/customAntiSniperPlayer.schema.json.
Fields
score
The score field allows you to modify the player's sniper score.
score.value
The value for the sniper score. Should be a float between -1 and 1 (or 0 and 1 if using mode: "set").
score.mode
The mode of the sniper score modification. The following two values can be provided.
add(default) - will add the providedvalueto the player's current sniper scoreset- will replace the player's current sniper score with the providedvalue
tags
The tags field allows you to provide an array of tags that will be shown to the user in the custom anti-sniper
tags column.
tags.icon
The code for the icon that should be used for this tag. Should use the
format mdi- + MDI icon name (e. g.
mdi-account-alert).
tags.text
Text that will be shown to the user as part of the tag.
tags.tooltip
Text that will be shown to the user in a tooltip on hover.
tags.color
A color to use for the tag in the form of an integer representation of a six-digit hexadecimal color code (e. g.
16777215 for #ffffff).
tags.textColor
The color that'll be used for the text in the tag. Uses the same format as tags.color.
It is recommended that you use colors Material colors to provide a similar feel to the rest of the application.
Example
{
  "score": {
    "value": 0.75,
    "mode": "set"
  },
  "tags": [
    {
      "icon": "mdi-account-alert",
      "text": "75%",
      "tooltip": "Sniper (Chance)",
      "color": 16717636
    },
    {
      "icon": "mdi-account-check",
      "tooltip": "Verified",
      "color": 58998
    }
  ]
}